
This post may contain affiliate links, which means I may earn a small commission from purchased products at no additional cost to you. See my full disclosure here.
Keep Your Fundraiser Volunteers Happy And Your Customers Smiling
Find the best tips for the week leading up to your church rummage sale, including secrets to organize, publicize, price, clean up, and deal with leftovers.
If you are holding a yard sale fundraiser at your church, you know the planning starts months ahead of time, but the week of the sale is when the boots hit the ground. This post is all about the final week of flurry and fun! If you are in the early planning stages, set yourself up for even more success by checking out: How Our Small Youth Group Raised $6000 In A One-Day Rummage Sale, including 10 steps for success, and what to do 3-6 months ahead of time!
Read on for the best tips for a great sale week, keeping your volunteer team happy, and your customers smiling!
Yard Sale, Garage Sale, Or Rummage Sale?
This question invariably comes up! What do we call the sale anyway? Although the words are often used interchangeably, since most churches don’t have garages or hold their sales in their yard, most churches call their sales rummage sales.
Rummage Sale Week Is A Flurry
Plan for lots of help the week of the sale. If you followed the 10 steps in “How Our Small Youth Group Raised $6000 in a One-Day Rummage Sale”, you already have a detailed plan, a team in place, and promotion well underway. What’s left?
- Setup
- Donation Collection
- Organization
- Pricing
- The Sale Itself
- Clean-up
Tried & True Tip: Stay flexible! Everything does not go as planned. Keep that in mind for a happier week.
Gather Rummage Sale Supplies
- Lots of plastic bags from grocery stores for clothing room and for purchases
- Poster board for outside sale signs AND for inside room category signs
- Boxes for outside road signage AND for purchases
- Black paint and 1” sponge brushes for making signs
- Permanent markers for signs and pricing
- Pre-printed price stickers
- Colored masking tape for pricing and the hold area
- Clear packing tape for signage
- Extra tables (pre-planned borrowing)
- Cash box & change
- Square Reader or alternative for credit card payments (optional)
- Pens, paper, and calculators for the cashiers
- Disinfecting wipes
- Trash bags
- Coffee, snacks, and lunch for volunteers
- Fabric or old sheets to drape church stuff
- “Ask Me” name tags to designate your volunteer team
- Pocket aprons for volunteers (optional but super helpful!)
Sunday: 6 Days Before The Sale
Start Collecting Donations
Following the Stuff the Trunk Campaign (from How Our Church Youth Group Raised $6000), your church members came to worship with carloads of stuff! After church, instruct people to pull their cars to the designated Drop-Off Door. As students cheerfully unload all cars, give everyone a flyer listing the donation times for the whole week. Thank them for their donations, and ask them to bring more stuff and tell their friends!
Organize As Donations Come In
- Dump clothes into one designated room (do not sort or unbag these yet!)
- Unbox everything else (except clothes) and take straight to pre-designated category areas: Household, Garden, Books, etc.
- Immediately throw out anything broken, stained, or damaged.
- Save all boxes! You will need them for purchases and re-boxing leftovers
- If you don’t know what an item is, neither will customers. Set unknown items aside. As they are identified, label the item name with masking tape
- Set aside antiques, collectibles, or high-priced items for a little research if time allows
Set Up Tables
While donations are being unloaded, get your table team working.
- Send a few drivers out to pick up the tables you reserved to borrow from area churches.
- Have a few others start setting up the tables you have.
- Follow the floor plan previously sketched out. Remember to keep 4 ft of walking space in between rows of tables. And rows that are longer than 3 tables need to have a 4 ft space to cut through. No one wants to feel trapped. More walking space means people will shop longer. Crammed spaces don’t attract customers.
Label All Areas With Temporary Signage
Scribble table categories on copy paper and tape them to individual tables. Label every table –– like Sheets & Towels, Kids’ Toys, Vases, Kitchen Items, etc. These labels are just for your team and will be removed later, but really helps get everything where it needs to go the first time. As more donations come in, you will probably move signs, expand some areas, and limit others, so stay flexible.
- Group “LIKE” stuff together
- Place furniture and appliances in a large open area
- Keep stuff that would be of more interest to men together (most men bee-line to “their” section)
- Household goods require the most table space
- Put shoes, belts, and scarves in a separate space, away from clothing
- Reserve an area for jewelry close to the checkout
- Special items (antiques & collectibles) should be together and close to the cashier area
- Clothing can be off in its own room
Tried & True Tip: If you have a room that can’t be used until Thursday because of mid-week meetings, designate that as your clothing room! Clothes won’t be set up until Thursday.
Drape Church Stuff With Fabric
If it’s not for sale, cover it up. Drape any church items that will be in a customer’s view (like kids’ games, musical instruments, or furnishing) with fabric or old sheets.
Take Photos For Social Media Posts
Designate a person to take photos and do social media posts each day until the sale.
As items come in, create excitement by posting photos on social media. From general, “Look what’s coming in!” to specific items for sale, be sure to highlight great-looking donations and not messy piles.
Include the upcoming sale date on social media, but also ask for more donations! List donation collection times. Make it easy for people to bring more stuff and offer pickups if you are able.
Share posts on church pages and accounts as well as personal pages.
Tried & True Tip: Personally ask key people in your church and community to please share your social media posts.
Monday: 5 Days Before The Sale
Collect Donations (details above)
Organize (details above)
Promote On Social Media (details above)
Start Cleaning
Clean items will sell better. Disinfecting wipes are most efficient for most things. But occasionally, a towel or a scrub brush might be needed. You won’t have time to make everything sparkle, but a quick dusting helps tons. Do your best with the time you have.
Set Up A Working Volunteer Table
Designate an easy-to-find Volunteer Table to use until Saturday, as a central place for supplies and snacks. Volunteers now have an easy spot to find everything they need: markers, price stickers, pocket aprons, masking tape, sharpies, pens, scissors, disinfecting wipes, and, of course, water & snacks!
Advertise On Craigslist & Online Facebook Groups
Start advertising your sale on Craigslist and Facebook groups. Different from your social media posts, this is all about getting people you don’t know to the sale: details on date, time, and location.
- Double-check your newspaper advertisement is ready to go for Thursday, Friday, and Saturday. If you forgot to do this, you probably still can! Many newspapers take advertisements up to 24-48 hours ahead of time.
- For Facebook groups, you usually need to be a member of the group to post. If you forgot to request membership a few months back, you may still be able to get in. Otherwise, ask around and find someone who is! And have them post for you.
Tuesday: 4 Days Before The Sale
Collect Donations (details above)
Organize (details above)
Promote On Social Media (details above)
Clean (details above)
Set Up Checkout Area
Set up your check-out area close to the entrance/exit door with a 6-ft table and 2 comfortable chairs. Make sure it is immediately seen and has a logical place for a line to form.
- Underneath the table, place a large box filled with plastic grocery bags for purchases.
- Add some extra boxes of varying sizes for heavier purchases.
- Cashiers will need calculators, notepads, pens, and a cash box filled with change. Gather these supplies, but keep them locked up until Saturday morning or they will disappear before!
Set Up A Hold Area
Near the cashier, set up a Hold Area with another 6-foot table and a chair.
- Use an empty bookshelf or office space to set items customers want, but can’t carry around while they shop.
- The Hold Area needs masking tape, permanent marks, and lots of empty boxes. Items held will be set in boxes and labeled with customers’ last names for easy purchasing.
Finish Outdoor Signage
If you did not make your outdoor sale signs before this week, do that now. Give students a template of one good-looking sign and make tons. The more signs you make, the more street corners you can advertise on. Attach the poster board signs onto cardboard boxes, and make sure you have a way to weigh them down so they don’t blow away.
Finish Indoor Category Signs And Clothing Room Signs
Use poster board to paint category signs for the walls and room entrances for easier directions. You will also need signs saying: MEN’S, WOMEN’S, and CHILDREN as well as “$1 for Bag of Clothing” for the clothing room. (Using black paint and a sponge brush will go faster than making signs with a permanent marker and save you money too!)
Tried & True Tip: We use neon green for all our signs –– road signs, categories, and directions in the building. It’s visible and quickly recognizable as our Rummage Sale Signage.
Wednesday: 3 Days Before The Sale
Collect Donations (details above)
Organize (details above)
Promote On Social Media (details above)
Clean (details above)
Begin Pricing
Pricing takes much longer than you think!
- Organize volunteers to price specific areas. (So Jill & Gwen might be in charge of linens and bedding, and Valerie & Jeannie might be in charge of household goods.) This keeps prices more consistent and ensures categories are completed.
- Give each pricer their own pack of pre-printed stickers, masking tape, permanent markers, and scissors. If you can secure some pocket aprons, they are really helpful to keep supplies together as your pricers move from table to table, and it’s easy to lose things!
- Print off lots of garage sale price estimates and give one to every pricer. Keep extra copies at the Volunteer Table too. As long as pricers are within the estimate range, don’t stress out too much about prices –– everyone has different opinions! Click here for one of my favorite printable guides: Yard Sale Pricing Guide.
- Price every item with pre-printed price stickers or masking tape with permanent marker. We use brightly colored masking tape for easier recognition.
- Do not batch-price anything except clothes and books.
Adjust Category Spacing
By now, you should be getting an idea of how much space you need for different categories. You may have tons more dishes than you thought and lots less baby items. Adjust placement; expand areas; shrink other ones. If things are too cluttered, you will sell less. So start making your shopping environment look inviting.
Thursday: 2 Days Before The Sale
Collect Donations (details above)
Organize (details above)
Promote On Social Media (details above)
Clean (details above)
Price (details above)
Set Up Clothing Room
You will probably have mountains of clothing donations. It is not worth your time or effort to pull out nicer items, fold them, or price individually. Simply sort clothes on tables for men, women, and children. Put only 2 people in charge of this room for less wasted time folding and sorting.
- Hang SEVERAL signs on the wall (at least one per wall and one outside the door) that say CLOTHING: $1 per bag. Place a large box by the entry door filled with regular-size grocery store plastic bags.
- Hang signage on the wall ABOVE tables for men’s, women’s, and children’s. If you place the signs on the table edges, no one will see them.
- Do not include shoes, belts, or scarves in the clothing room. Those are priced differently.
Start Working On Display For Visual Appeal
Now that most of your items have arrived, start making everything look pretty. Cluttered messes do not sell (except clothing).
- Think of visual appeal –– taller things in the back. Attractive things in front.
- If you have large quantities of things (i.e., vases, Tupperware), consider putting an overflow box under the table, but visible. (Overflow items still need to be individually priced! No batch pricing except clothes & media!)
- As you make things look nice, take extra care to clean visible dirt & dust.
- And, if you find broken things, toss!
Friday: 1 Day Before The Sale
Collect Donations (details above)
Organize (details above)
Promote On Social Media (details above)
Clean (details above)
Price (details above)
Display For Visual Appeal (details above)
Finalize & Hang Your Signage
Hang up your big, bright signage for all areas so customers can quickly find what they are looking for!
Tried & True Tip: We save and use our signage from one year to the next. This saves lots of time and, of course, money too!
Saturday: Sale Day!
Hopefully, everything is ready to go by Saturday morning! So, on this day, you need to serve with a smile, collect lots of money, and make new friends in the community.
Run The Sale
- Start with Morning Team Huddle to go over last-minute instructions and confirm assigned roles.
- Give everyone on your team an “ASK ME!” name badge. (we use neon green)
- Every area needs a Room Leader to answer questions, reprice, and negotiate. Room Helpers (students) greet customers, keep rooms organized, and assist with carrying items or taking them to the Hold Area. Car loaders help with loading purchases. Cashiers run the pay area. A Hold Area is staffed near the checkout.
- Keep volunteers happy with coffee, snacks, and a grab-n-go lunch they can eat on the job.
- Organize throughout the day as things are purchased and shuffled. Keep it looking pretty!
- If you are in a region with a secondary language (like we are in Tucson!), it’s great to have a translator by the checkout station.
- Consider putting everything half off during the last ½ hour. (But don’t advertise that ahead of time.)
Clean Up
- Consolidate all left-over items to an “after-sale” room.
- Have the people who picked up borrowed tables return them to their churches.
- Have someone carefully collect all reusable indoor signs, ASK ME tags, and supplies for next year.
- Send a team out to gather outdoor road signs from the community.
- Clean the church and get it ready for Sunday morning.
- Then … you can go home and collapse!
Sunday: 1 Day After The Sale
Hold An “After-Sale” For Church Members
- Encourage worshipers to take leftover items for any donation. (Ignore leftover price tags!)
- After your church members leave, box all items so they are ready to be picked up on Monday morning. (Hopefully, you pre-arranged a pickup with the Salvation Army, Goodwill, or another non-profit)
Evaluate And Plan For Next Year
Within the week after your sale, consolidate your notes on what went great, what didn’t, and how you can improve next year. Talk with your volunteers and students, and add their input to your own. The more details you track, the easier it will be to duplicate the great stuff, and improve the not-so-great!
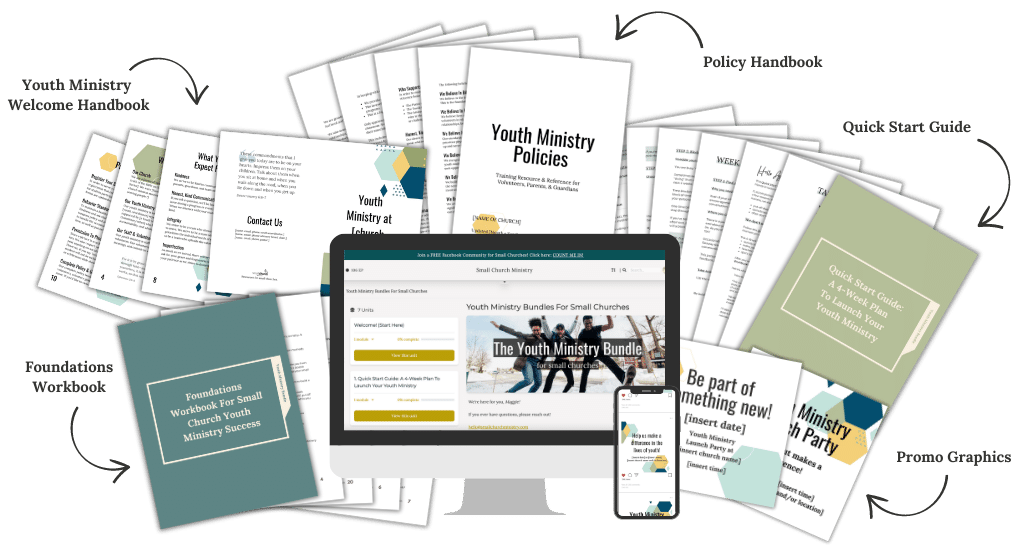
Looking for a step-by-step to starting or restarting your youth ministry?
Check out the Youth Ministry Bundle For Small Churches!
Read More:
How Our Small Church Youth Group Raised $6000 In A One-Day Rummage Sale
Your Ultimate Guide For Finding, Keeping, And Appreciating Volunteers