

This post may contain affiliate links, which means I may earn a small commission from purchased products at no additional cost to you. See my full disclosure here.
Looking for Mother’s Day crafts to do in your children’s church? Here are 4 fun and unique Sunday school craft ideas.
As you may have experienced, there is no greater joy than to receive a homemade gift from kids of all ages: the expression on their face, the pride in their project, and the love connected with it are all such a blessing.
The following are some crafts we have done in the past for giving on Mother’s Day or at any time. They are simple Mother’s Day craft ideas that would be best suited for older kids in elementary school, but younger kids could make them if they have assistance.
If you do choose to do these on Mother’s Day, be sure to make it easy for all kids to participate, no matter what family situation they may be in. Regardless, these crafts can be personalized for anyone –– moms, grandmothers, a special aunt, a teacher, or any special woman in the young artist’s life.
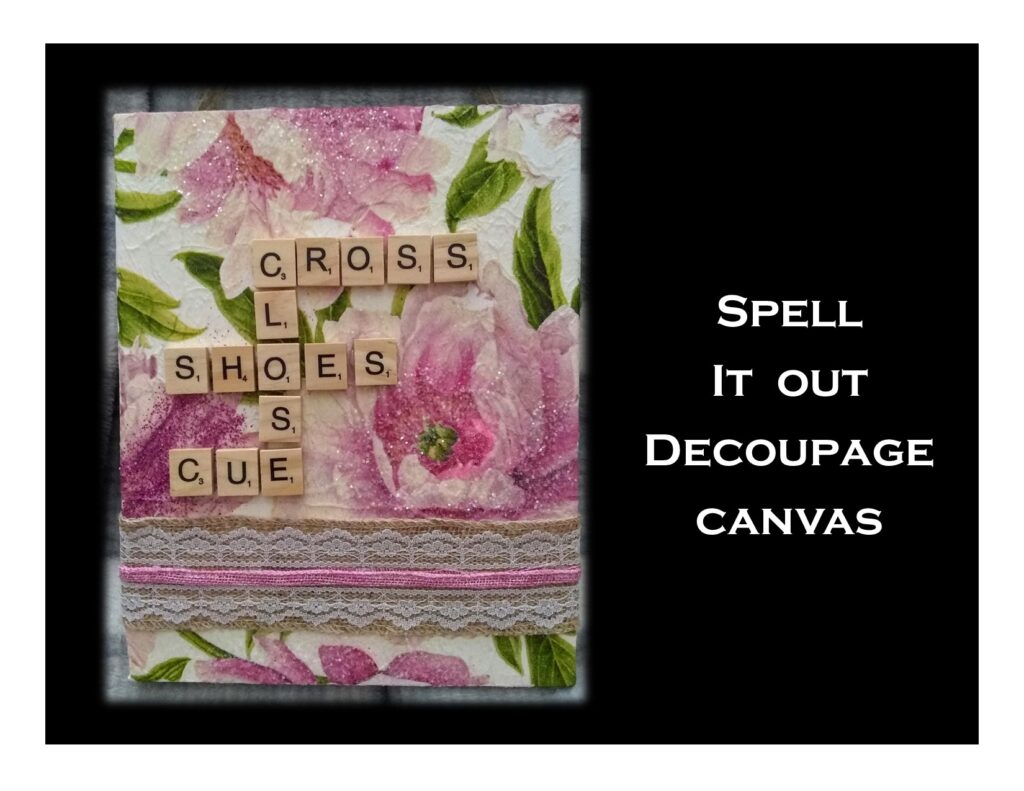
1. Spell It Out: Decoupage Canvas
Craft Materials Needed:
- 8 x 10 artist canvas
- Decorative napkin or tissue paper (separated into a single-ply layer)
- Decoupage glue
- Foam brush
- Wooden Scrabble-type tiles (available on Amazon)
- Glitter as desired
- Hot glue or craft glue
- Ribbon or jute for a hanger
Instructions:
- Firstly, brush the entire canvas with the decoupage glue –– a nice, even light coat.
- Take the napkin or tissue paper and place it over the canvas. Then use your foam brush to push down the edges and try to tap down any bumps or wrinkles you may have. (A few are fine. It’s a fun way to add depth and character!!)
- Then brush a thin layer of decoupage glue over the entire canvas and napkin or piece of tissue paper, which will seal in your project. Use a tapping motion with the brush so you don’t pull the napkin up away from the canvas. Make sure the entirety of your napkin is covered with glue.
- While your project is still wet, lightly sprinkle glitter on different areas or around the edges of the canvas. Set your project aside to dry. (2-3 hrs.)
- Then, take the letter tiles and make words that remind you of the person you are giving this to. (You can go across, up, down, etc. Try to make it connect like a crossword puzzle). Then, glue the letters onto the canvas using craft glue or hot glue.
- Use a coordinated ribbon to add a border along the bottom and then use a piece of jute to make a hanger for your canvas. Lastly, glue it to the back of the frame.
2. ‘Luv-U’ Fox

Craft Materials Needed:
- Piece of wood: 1 inch thick, 4 inches long
- Acrylic paint
- Paintbrushes
- Felt for arms, tail & ears
- Sharpie for writing/outlining
- Makeup blush
- Hot glue or craft glue
Instructions:
- Firstly, draw your pattern onto the block of wood.
- Paint your fox body, sides, and back, then paint the white patches for the eyes and belly.
- Once the paint is dry, outline the white sections with a black Sharpie, and draw in the nose and the ‘u’ shaped eyes. Write your greeting on the belly with a fine line tip.
- Then, use blush and a cotton swab to apply to the cheeks and the insides of the ears.
- Paint a small white tip onto the felt cutout of the tail. Afterward, use the Sharpie to make paw prints on the felt hands.
- Then, glue the felt pieces onto the fox with craft glue or hot glue.
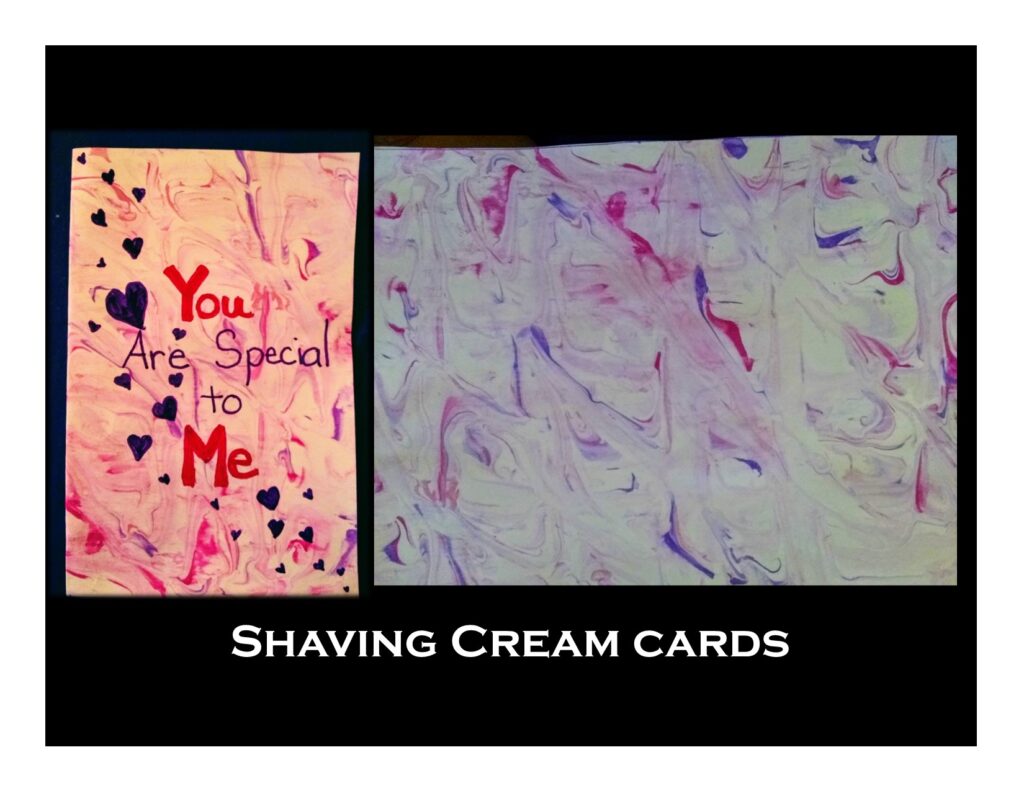
3. Shaving Cream Cards
Craft Materials Needed:
- Sheets of 8 ½ x 11 white cardstock
- Cookie sheet lined with wax paper
- Plastic forks
- Wide popsicle sticks
- Scrap piece of cardboard to use as a squeegee
- Acrylic paint
- Shaving cream (cheap, white, fluffy kind)
- Optional: trash can with a liner, close to where you’re working
Instructions:
Fair Warning: This one is messy!! Of course, who said messy isn’t fun, right?
- Before you start, make sure you designate an area to dry your cards. Put down a plastic tablecloth or tarp to avoid getting wet paint on anything. Have paper towels handy for cleaning hands or use plastic gloves.
- Then spray a 1-inch layer of shaving cream on your cookie sheet, and use a plastic knife to spread it around to make an even layer.
- Then, squirt paint onto the shaving cream in a random pattern, only using a drop or two each time you squirt it. Make sure to leave a couple of inches in between each place you drip the paint –– white space is good!!
- **You can mix colors, but don’t use more than three because it will just end up ‘muddy’. Two or three colors work best.**
- After the paint is on the shaving cream, use the fork and swirl the paint in an ‘s’ pattern, then change directions and go up and down. Again, don’t mix too much. You want more of a marbled feeling.
- Take your piece of cardstock and gently lay it on top of the shaving cream. Lightly press it into the shaving cream and give it a slight ‘wiggle’.
- Then with two hands, lift straight up and remove your cardstock. *NOTE: Your cardstock will be covered with shaving cream. Bring your sheet over to the trash can, use the scrap piece of cardboard, and with a pulling motion, scrape off the excess shaving cream into the trash can.
- The shaving cream will come off, but the marbleized paint will remain on your sheet.
- There will still be paint and shaving cream left on your cookie sheet. You should be able to get 2-3 more prints from it. Then peel off the wax paper, discard and start fresh. (If you need to add a few more drops of paint, go ahead!)
- Set your cardstock sheet aside to dry. Once dry, fold it into a card, cut out hearts or star shapes, write your greetings on the inside, and make someone’s day!! You could also frame your artwork as a gift. Have fun!
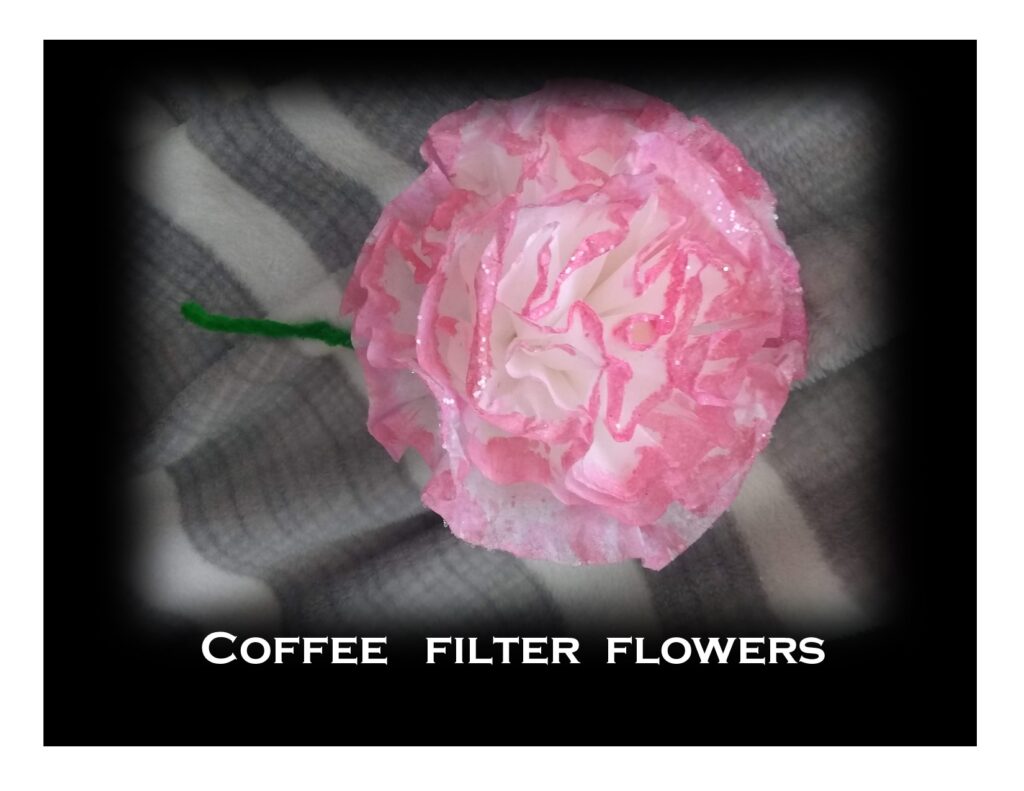
4. Coffee Filter Flowers
Craft Materials Needed:
- Standard-size coffee filters (fits an 8-12 cup machine), 10 filters per child
- 2 green pipe cleaners per flower
- Craft glue
- Various colors of Glitter
- Small Foam brush
- Child’s paintbrush
- Acrylic paint
- Paper plate
- Scissors
Instructions:
- Fold 1 of the pipe cleaners in half and twist them together to make your ‘stem’.
- Next, take one coffee filter and fold it in half.
- Place a small line of glue across the straight folded edge of the coffee filter
- Then put the green stem at the right end of the coffee filter (about ½” of the stem onto the filter). Make sure to place the stem on the glue and roll the pipe cleaner up in the coffee filter. When you get to the other side, pinch the bottom of the coffee filter onto the pipe cleaner to secure the glue. This is the center of your flower.
- Now you will make your petals using your other coffee filters, working one filter at a time.
- Fold it in half, then in half again, then cut a snip at the top of the coffee filter fold (the pointed end) to make a small hole in the center of your petal. The hole should only be about the size of the eraser on a pencil or the tip of your pinky finger.
- Once you’ve done that, unfold the filter, and place a ring of glue around the outside of the hole in the center of the filter.
- Then, put the green pipe cleaner stem through the hole. Push the coffee filter down the stem and up around the center of your flower, matching the ruffled edges of the filters. Gently fold the ruffles as you push them down onto the stem. Pinch the bottom of the filter where the hole is onto the pipe cleaner stem. Pinch it tightly, which will set the glue.
- Repeat this process with up to 9 filters, making the flower as full as you would like.
- On the last flower, remember to put 2 rings of glue on the coffee filter –– one in the center around the hole and another one about ½ inch out from the center. When you place this last flower petal onto the stem, squeeze and pinch the glue onto the stem and the other petals. Squeeze the last flower petal gently in your hand to secure the glue.
- You will have about an inch of coffee filter pinched onto the base of your flower stem where all the glue is. To make sure all the petals stay down, take your other pipe cleaner and wrap it tightly around the base of your flower petals. Gradually wind the pipe cleaner down and onto the stem. Fluff out your flower, so it’s full.
- To color your flowers: Place a small amount (about the size of a quarter) of paint onto the paper plate, mix with an equal amount of water, and stir well. Then, take your foam brush, pick up a small amount of paint, and lightly stroke it onto the tips of your coffee filter petals. Just light amounts of paint because the water will soak into the filters!
- Now take your artist brush and lightly dab glue onto the edges of the petals, then sprinkle with glitter. Shake off the excess.
- Lastly, let your flower dry and place it in a vase. Spray with perfume if you like!!
Looking for a step-by-step guide to starting or restarting your children’s ministry?
Check out the Children’s Ministry Bundle For Small Churches!

Read More


These are great ideas! Shaving cream is always a big hit with the kids!!
I love the fox one!